Category: Setup and Care

Inflatable dock setup and care: how to install and anchor a floating dock, what weight capacity numbers really mean, how to handle current and debris on a river, how to find and repair a leak, and how to store and winterize an inflatable dock so it lasts for many seasons. Step-by-step advice drawn from the makers’ manuals.

  • Floating Dock Ramps, Gangways and Hardware: How It All Connects

    Floating Dock Ramps, Gangways and Hardware: How It All Connects

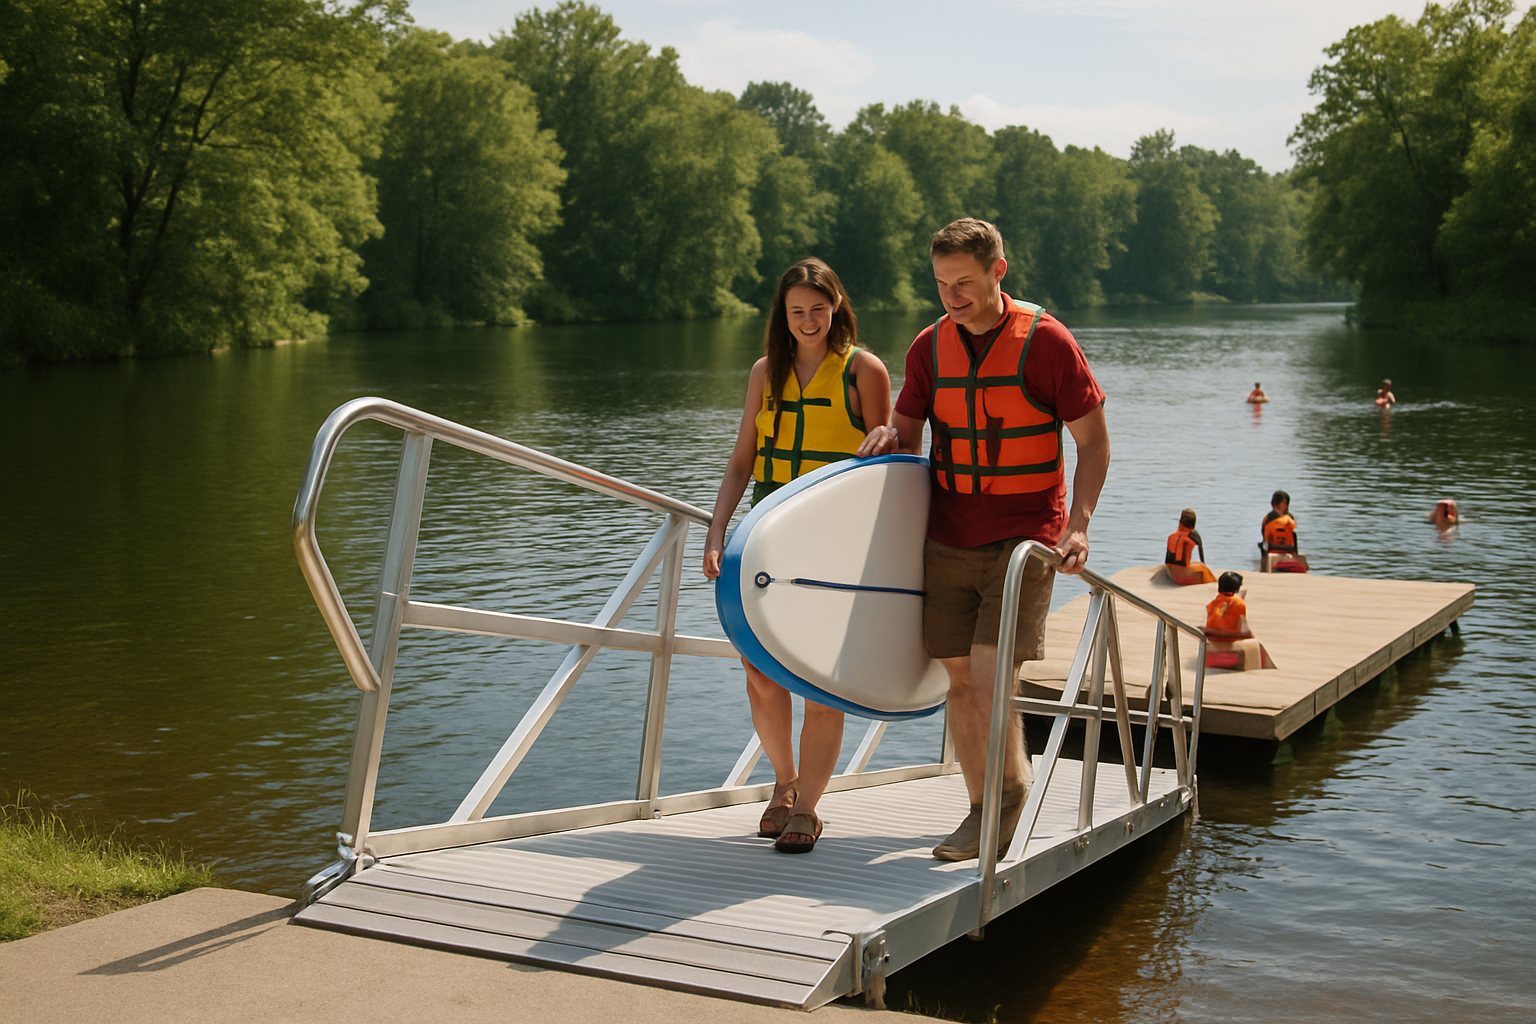
    Late August on a reservoir, and the water is two feet lower than it was on Memorial Day. The dock still floats perfectly level, but the walk down to it has turned into a steep little slide, and someone carrying a cooler is taking it very slowly. That walk is the floating dock ramp, and together with the brackets, hinges and pins that hold the sections together, it decides whether a floating dock feels solid or sketchy. This guide covers how a floating dock connects to shore and how its sections connect to each other, using the figures makers and retailers actually publish.
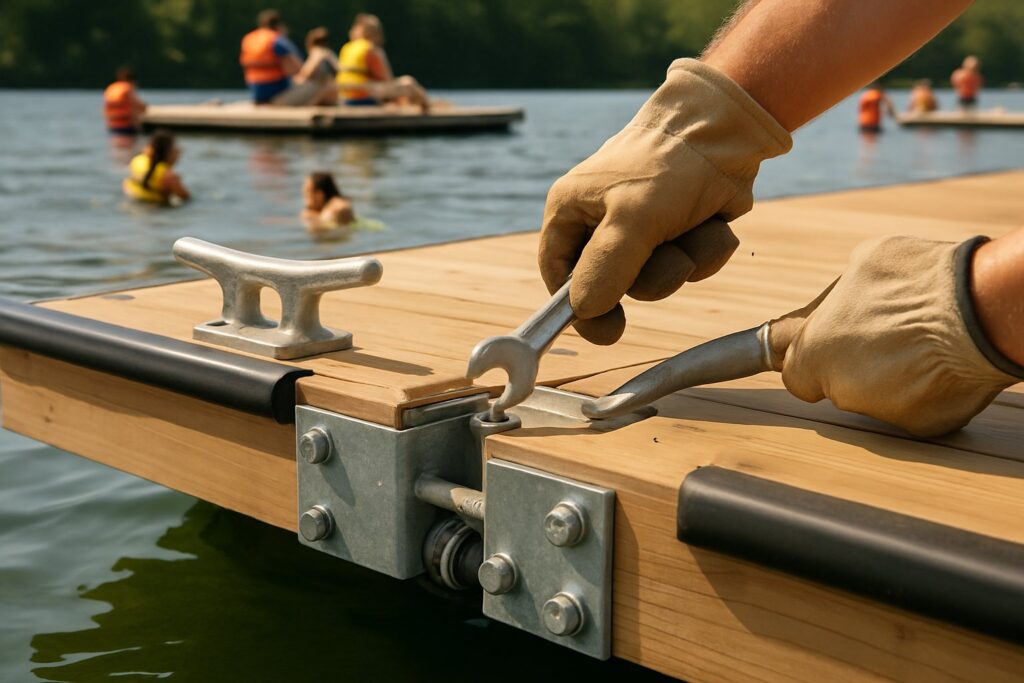
    Close view of galvanized corner brackets and a cleat joining two floating dock sections

    In short: a floating dock ramp (or gangway) is hinged at the shore end and rests on rollers or a slider on the dock, so it can change angle as the water rises and falls. The longer the ramp, the gentler the slope for the same change in water level. The U.S. Access Board’s guidance for covered public boating facilities sets a 1:12 maximum slope for gangways, with exceptions; private docks are not bound by it, but it is a useful benchmark. Floating dock hardware (corner brackets, hinge connectors, pipe holders, stiff arms) is usually hot-dip galvanized steel for fresh water, with stainless or aluminum options for salt.

    What a floating dock ramp actually does

    A floating dock moves; the shore does not. The ramp bridges the two, so it has to allow movement at both ends. The usual arrangement in floating dock systems is a hinge at the shore end, bolted to a seawall, a concrete pad, a deck or posts, and rollers or wheels on the dock end, which roll back and forth across the deck as the angle changes. Wahoo, for example, describes its aluminum gangways as equipped with a bulkhead hinge mount and deck rollers, with rollers on the dock end. Dock Hardware’s DH-RRA4 ramp roller assembly is sold for exactly this job, to support floating dock ramps as water levels rise and fall.

    A floating dock gangway and a floating dock ramp are much the same thing on a residential dock; makers tend to say gangway for the longer, railed versions. Both differ from a transition plate, the short hinged plate at the end of a gangway that smooths the step onto the dock. Some systems skip the separate ramp altogether: Multinautic’s semi-floating dock kit has one end linked to the shore and the other on floats, and the maker says it adjusts automatically to water level changes of up to 1 m (3 ft).

    EZ Dock says the best docks for lakes with fluctuating water are those with a gangway, which lets the dock sit over deeper water. For bigger swings, see our guide to a floating dock on a river.

    Ramp length, water level and slope: the simple geometry

    The ramp is the long side of a right triangle. The height of that triangle is the difference between the shore hinge and the dock deck, and it changes with the water. To size a ramp, you need the lowest water level you expect, because that is usually when the drop is greatest and the ramp is steepest (if the dock can rise above the shore hinge at high water, check that end too). Slope is the rise divided by the horizontal run.

    A worked example (illustrative numbers, not a recommendation): say the dock deck sits 3 ft (0.9 m) below the shore hinge at your lowest water. Here is what different ramp lengths give you:

    Ramp lengthDrop at low waterHorizontal runSlopeAngle
    16 ft (4.9 m)3 ftabout 15.7 ftabout 1:5.2 (19%)about 10.8°
    24 ft (7.3 m)3 ftabout 23.8 ftabout 1:7.9 (12.6%)about 7.2°
    about 36 ft (11 m)3 ft36 ft1:12 (8.3%)about 4.8°
    16 ft, water 2 ft higher1 ftabout 16 ftabout 1:16 (6.3%)about 3.6°

    The pattern is what matters: doubling the drop doubles the slope, and only a longer ramp brings it back down. The same 16 ft ramp that is a gentle walk at summer pool level can feel steep after a drawdown. That is why makers sell ramps in a range of lengths. ShoreMaster’s residential gangway comes 4 ft wide in 16, 20 and 24 ft lengths; Wahoo lists widths from 32 to 72 in and lengths up to 80 ft; Tommy Docks sells modular aluminum gangways in 4, 8 and 12 ft sections. Ask your dealer for their own slope guidance, and give them your real high and low water numbers.

    What the ADA guidance says about gangway slope

    The U.S. Access Board’s guide to the ADA standards for recreational boating facilities is the clearest published benchmark. It says gangways must be designed to provide for a maximum 1:12 (8.33%) slope, but are not required to be longer than 80 ft. In smaller facilities with fewer than 25 boat slips, the slope may exceed 1:12 if the gangway is at least 30 ft long. Landings are not required at the ends of gangways if transition plates are provided, and a transition plate steeper than 1:20 (5%) needs a landing.

    Two cautions. First, these rules apply where gangways are part of the accessible route to accessible boat slips at newly built or altered recreational boating facilities covered by the ADA (marinas, public launches, piers); a private dock behind your house is not the target. Second, local building codes, lake associations and permits may still set their own rules, so check our permits and local rules guide before you build.

    Ramp materials and features

    • Aluminum frames are the norm for bought gangways: light enough to handle, and they don’t rot. Tommy Docks says its marine-grade aluminum frames will not rust or rot. Candock’s 4 x 16 ft welded aluminum gangway lists a maximum load of 1,750 lb; Wahoo lists load capacities up to 100 lb per sq ft. Many makers publish no load rating at all; Tommy Docks only says its frames are rated for foot traffic, gear and the occasional loaded hand cart.
    • Decking can be cedar, composite, polypropylene panels or aluminum. Tommy Docks offers cedar, composite and thermoformed decking on the same frame; ShoreMaster and Candock sell the frame with decking sold separately.
    • Handrails. ShoreMaster says handrails are necessary for the longer distances its gangways span. Candock’s 16 ft gangway has 42 in bolt-on railings on both sides; Wahoo’s dual handrails are standard, with a no-handrail option only under 20 ft.
    • Transition plates cover the step between the end of the ramp and the dock deck. Candock’s welded gangways include a 16 in transition plate; Wahoo sells them as an accessory.
    • Non-slip surface. A wet ramp at an angle is where people fall. Choose textured decking or anti-slip treads (Wahoo lists anti-slip cleats as an accessory), and keep the surface clear of algae.

    Prices vary a lot, from a short modular section to a long railed gangway. When checked in October 2026: Tommy Docks listed its aluminum gangway with Titan decking at $775 (4 ft), $1,575 (8 ft) and $2,375 (12 ft); boatliftanddock.com listed ShoreMaster’s residential gangway at $3,595 (length not stated on the page) and Candock’s 4 x 16 ft railed gangway at $4,855. All three ship as freight or require pickup for longer sizes.

    Floating dock hardware, piece by piece

    Wood-frame and many aluminum floating docks are held together by a small set of steel parts. If you are building your own frame or repairing an old one, these are the names you’ll see:

    PartWhat it doesPublished example
    Inside corner bracketSquares and stiffens the frame from inside each cornerExtreme Max inside corner kit: 3.2 mm galvanized steel, 2 corners and 4 backer plates
    Outside corner (male / female)Wraps the outside corner; paired male and female corners make a hinge point between sectionsDock Hardware DH-M and DH-F: 1/4 in hot-dip galvanized, 10-1/4 x 5 in legs
    Corner bracket for small framesJoins frame boards at the cornerTommy Docks CB5: 3/16 in hot-dip galvanized, for 2 x 6 frames, 1/2 in carriage bolts sold separately
    Hinge / link connector (T-style)Joins two dock sections along a face so they can flexExtreme Max link kit: two 5 in square hinge-link assemblies with backer plates
    Backer plateSpreads the bolt load on the inside face of the boardIncluded in most kits; Extreme Max says they reduce pull-through and worn holes
    Pipe holder / collarHolds a vertical pipe the dock slides up and downTommy Docks pipe guide kit: auger, pipe, sleeve bracket and cap, $96
    Stiff armRigid arm from shore that stops side-to-side drift while the dock rises and fallsShoreMaster heavy-duty stiff arm: to a seawall, deck or post; pipe sold separately
    Float bracketBolts the floats under the framePatriot Docks sections include float mounting bracket sets
    Bumpers and edgingProtect boats from the dock edgeDock Edge Full Face profile: flexible marine-grade PVC, 4-1/2 in high, three 8 ft pieces

    Read the bolt sizes before you order: many brackets take 1/2 in carriage bolts, some take 3/8 in, and mounting bolts are often sold separately (Tommy Docks and Extreme Max both say so on the parts above). Cleats are a separate purchase; bolt them through the frame with a backer, not just into decking. For tying up, see safe boarding and tying up, and for ladders, cleats and bumpers, our dock ladders and accessories guide.

    Stiff arms and pipes are also part of how the dock stays in place, which is covered in more depth in how to anchor a floating dock. ShoreMaster notes that a stiff arm is a good choice where augering into the lake bottom, river bed or seafloor is restricted or prohibited.

    Joins two sections

    Extreme Max 3005.5588 Floating Dock Link Connector Kit

    • Two 5 in hinge-link sets
    • Backer plates included
    • Galvanized, about $81
    Check price on Amazon
    Corner hinge, made in USA

    Dock Hardware DH-CLK Floating Dock Corner Link Kit

    • 1/4 in hot-dip galvanized
    • Male + female corners, pin
    • 16 bolt sets, about $100
    Check price on Amazon
    For aluminum frames

    Patriot Docks Low-Profile Floating Hinge Kit

    • Marine-grade aluminum
    • 4 ft x 1 in hinge pipe
    • About $107
    Check price on Amazon
    Frame corners

    Extreme Max 3005.5516 Dock Inside Corner Bracket Kit

    • 3.2 mm galvanized steel
    • 2 corners, 4 backer plates
    • Freshwater, about $29
    Check price on Amazon

    Galvanized, stainless or aluminum: fresh vs saltwater

    Most floating dock hardware sold in the US is hot-dip galvanized steel: strong, affordable and well suited to fresh water. Makers are fairly honest about its limits. Extreme Max says its galvanized inside corner kit protects against rust in freshwater marine environments; Tommy Docks says its galvanized pipe guide kit is not recommended for salt or brackish water. On the other side, Dock Hardware describes its 1/4 in hot-dip galvanized corners as corrosion resistant in fresh or salt water, and also sells a 316 stainless steel line for saltwater docks, which it says lasts up to 5 times longer in fresh water and up to 10 times longer in salt than its galvanized connectors.

    Aluminum is common for frames, gangways and some hinges; Patriot Docks’ hinge kit is marine-grade aluminum, and the maker describes it for freshwater use. If you dock in salt or brackish water, ask the maker directly which hardware line they recommend, use one metal family where parts touch, and rinse and inspect bolts every season. For EZ Dock systems, the maker says hardware is available for both fresh and salt water.

    How floating dock sections connect

    There are two basic ideas. A rigid connection bolts sections into one stiff platform; it feels solid underfoot but passes every wave load through the joints. A hinged connection lets sections flex at the joint, so each piece can follow the water. Most wood and aluminum floating dock sections use hinged links: Extreme Max’s kit mounts through the faceboards of two opposing sections, and Patriot Docks says its hinge kit is designed to flex with changing water levels, with a hinge set used every 16 ft of floating dock.

    Modular plastic docks use their own connectors. Candock cubes are joined by a polyethylene connecting pin that passes through the tabs of neighboring cubes and threads into a sliding nut, tightened with a G2 key. EZ Dock sections are linked with its coupler system, which the maker says gives stability and shock absorption; the same couplers attach EZ Dock to gangways, stiff arms and other docks. If you are mixing brands, ask about adapters before you buy. Our modular docks page compares these systems, and floating dock designs and layouts shows how sections are usually arranged (straight, L, T and U shapes).

    Inflatable docks are a different case: they are usually anchored as stand-alone platforms rather than linked to a ramp, and makers such as RAVE say not to connect them directly to piers or other hard objects. See inflatable docks for how those work.

    Putting it together

    1. Measure the water. Note high and low levels for the season, and the height of your shore abutment.
    2. Choose the ramp length from the drop at low water, using the geometry above and your maker’s guidance.
    3. Build or set a solid shore abutment for the hinge: a seawall, concrete pad or set posts.
    4. Put rollers on the dock end, with enough deck length for them to travel, and a transition plate if the step is high.
    5. Connect the sections with the maker’s hinges or couplers, backer plates on every bolt through wood.
    6. Hold the dock in place with pipes, stiff arms or anchors, then check every bolt after the first storm.

    The full sequence, from site check to first season, is in our floating dock installation guide, and the Setup and Care hub has the rest.

    Floating dock ramp and hardware questions

    How long should a floating dock ramp be?

    Long enough that the slope is comfortable at your lowest water. Find the drop from shore hinge to dock deck at low water and work out the slope for each length you are considering; a 3 ft drop is about 1:5 on a 16 ft ramp and about 1:8 on a 24 ft ramp. Public facilities covered by the ADA aim for 1:12, which would take about 36 ft for that same drop.

    Which end of the gangway gets the hinge?

    Usually the shore end is hinged and the dock end rolls on wheels or a slider, because the dock moves and the shore does not. Makers sell both ends as options: Wahoo, for instance, lists a bulkhead hinge and a roller assembly as separate end options for its aluminum gangways.

    Can I use galvanized floating dock hardware in salt water?

    Some makers say yes and some say no, product by product. Tommy Docks says its galvanized pipe guide kit is not recommended for salt or brackish water, while Dock Hardware describes its hot-dip galvanized corners as corrosion resistant in fresh or salt water and sells a 316 stainless line for saltwater docks. Follow the maker of the part you buy.

    How do floating dock connectors work?

    On framed docks, a male and female plate (T-style or corner) bolt to facing sections and a steel pin drops through their ears, making a hinge. On modular plastic docks, pins or couplers lock the sections together. Either way, the joint is meant to flex a little; check pins and bolts every season.

  • How to Store an Inflatable Dock (and Winterize a Floating Dock)

    How to Store an Inflatable Dock (and Winterize a Floating Dock)

    Labor Day weekend: the last swim off the dock, the last sunset with your feet in the water, and then the job nobody looks forward to. How you put an inflatable dock away decides whether it comes out next June firm and clean or musty, sticky and chewed. Good inflatable dock storage takes an afternoon and a dry spot in the garage. This guide follows the makers’ own manuals for cleaning, drying, folding and storing, covers overnight and mid-season storage, and explains how winterizing a rigid floating dock differs.

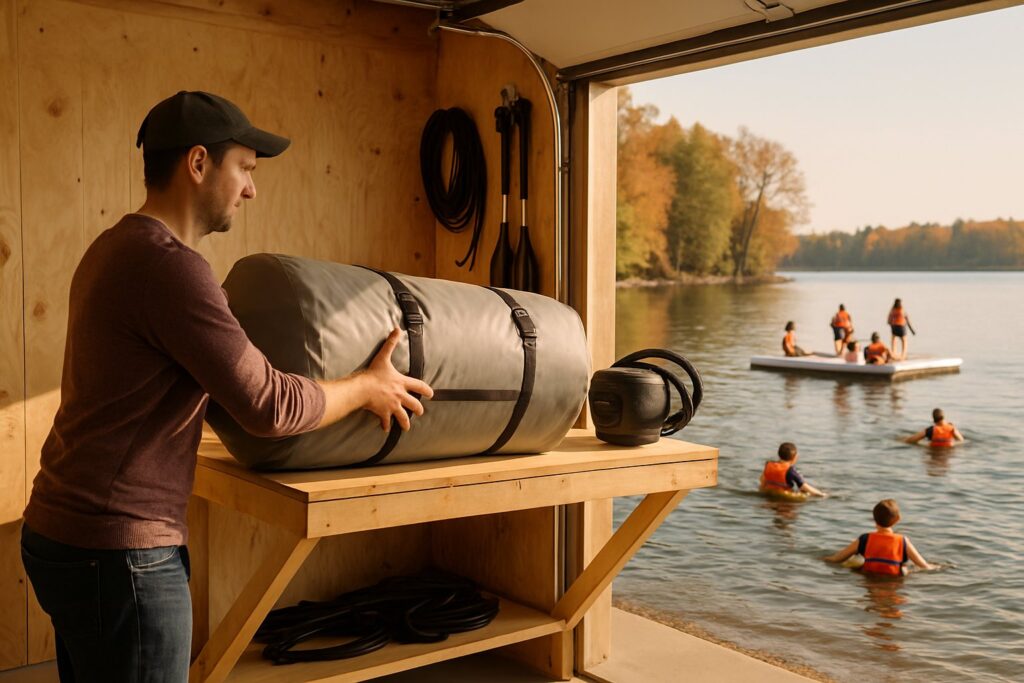
    Deflated inflatable dock rolled up in its bag on a garage shelf

    In short: bring the dock ashore without dragging it, wash it with mild soap and fresh water, dry both sides completely, deflate fully, fold it in thirds and roll it loosely toward the valve, then store it out of the sun in a clean, dry, rodent-proof place. Aquaglide says never to store its products damp or below 40 °F (4 °C). Rigid floating docks are a different job: makers suggest removing them where ice shifts.

    Inflatable dock storage, step by step

    1. Bring it ashore the right way. RAVE’s manual says to carry the dock to land, or deflate it carefully on a flat surface on your boat, and to be “extremely careful not to drag the product.” Unclip anchors and lines first.
    2. Clean it. Use mild soap and fresh water with a soft brush or sponge. Aquaglide says not to use petroleum-based cleaners and to avoid high-pressure washing, which can damage the product; RAVE’s manual also rules out petroleum products and solvents.
    3. Protect it. Aquaglide recommends regularly applying a UV protectant to exposed surfaces and doing so before storage.
    4. Dry it completely. RAVE suggests letting the dock dry for 15 minutes or longer in the sun, flipping it to dry the other side, and towelling off anything still damp. Aquaglide: confirm it is completely dry before folding.
    5. Deflate fully. Aquaglide suggests an electric pump in deflate mode to get the last air out; RAVE’s own rapid inflator has a deflate side.
    6. Fold and roll. RAVE: fold the dock into thirds with the EVA pad sections folded in, then roll it like a sleeping bag starting from the end opposite the valve, and secure it with the straps. Aquaglide: fold in thirds, then roll loosely toward the valve.
    7. Store it well. Out of direct sunlight, in a clean, dry place such as a sealed closet, crate or container that keeps rodents out (Aquaglide), and never damp or below 40 °F.

    Rolling toward the valve lets air left inside escape as you go. A rolled dock is compact, so plan a shelf or closet rather than a corner of the boathouse. Folded sizes that makers and dealers publish:

    DockInflatedFolded or rolledWeight
    BOTE Inflatable Dock 77 x 7 ft, 8 in44 x 19 x 10 inAbout 35 lb
    BOTE Inflatable Dock 1010 x 10 ft, 8 in63 x 22 x 10 inAbout 83 lb
    Solstice 10 x 1010 x 10 ft, 6 in29 x 18 x 11 in54 lb
    Island Hopper Yacht Dock10 x 6 ft, 6 in40 x 16 x 14 in53 lb

    Where to store it: what the makers say

    ConcernRAVE (Aqua Dock manual)Aquaglide (C-Deck manual)
    SunStore in a covered, shaded area to protect against UVOut of direct sunlight; apply UV protectant
    MoistureDry fully before foldingNever store in a damp location
    ColdNot statedNever store below 40 °F (4 °C)
    RodentsMuskrats may chew the PVC; on the water, keep full pressure or take it out at nightStore in a sealed closet, crate or container against rodent damage
    FoldingThirds, EVA pads in, roll from the end opposite the valveThirds, roll loosely toward the valve(s)

    Aquaglide’s 40 °F rule matters for anyone who planned to leave the dock in an unheated shed through a northern winter. If your garage drops below that, store the dock indoors in a basement or closet. Other makers may publish different figures; check your own manual.

    Overnight and mid-season storage

    You don’t have to pack the dock away every evening, but RAVE’s manual does say that after use it is best to deflate and fold it for storage to prevent damage and extend its life. If you leave it out between weekends, keep it at full pressure and well anchored, and check the pressure in the morning and the afternoon: air expands in the sun and contracts at night. RAVE notes that full pressure discourages muskrats, and taking the dock out of the water at night removes the temptation. Before a forecast storm, bring it in; RAVE says never to use its dock in high winds, waves or storms, and no consumer dock maker we checked publishes a wind limit. Some lakes also have rules on what may stay in the water overnight; ask your local agency.

    Winterizing a floating dock that isn’t inflatable

    If you also own a rigid floating dock, winterizing it is a different decision: leave it in or take it out. The makers we checked put the risk on moving ice rather than cold:

    • Connect-A-Dock says freezing temperatures won’t harm its polyethylene docks, but “with shifting ice, we recommend removal for the winter months.”
    • EZ Dock says ice can be very detrimental and floating ice carried by currents can damage docks and gangways. It calls removal the best protection in severe winters, says sectional floating docks generally don’t need removal in normal winters, and recommends removing the dock and pilings where ice flow is severe.

    Whichever you choose, ask your dealer about the anchoring in winter, since water levels change and fasteners can work loose through freeze and thaw. For more on rigid docks, see EZ Dock vs inflatable docks, Wave Armor vs inflatable docks and inflatable vs rigid floating docks.

    Spring: getting the dock back out

    • Unroll on a clean, flat surface free of rocks and sticks, and look over the deck, seams, handles, D-rings and valve.
    • Inflate to the maker’s pressure with a gauge, leave it for a few hours, and check it again before you float it.
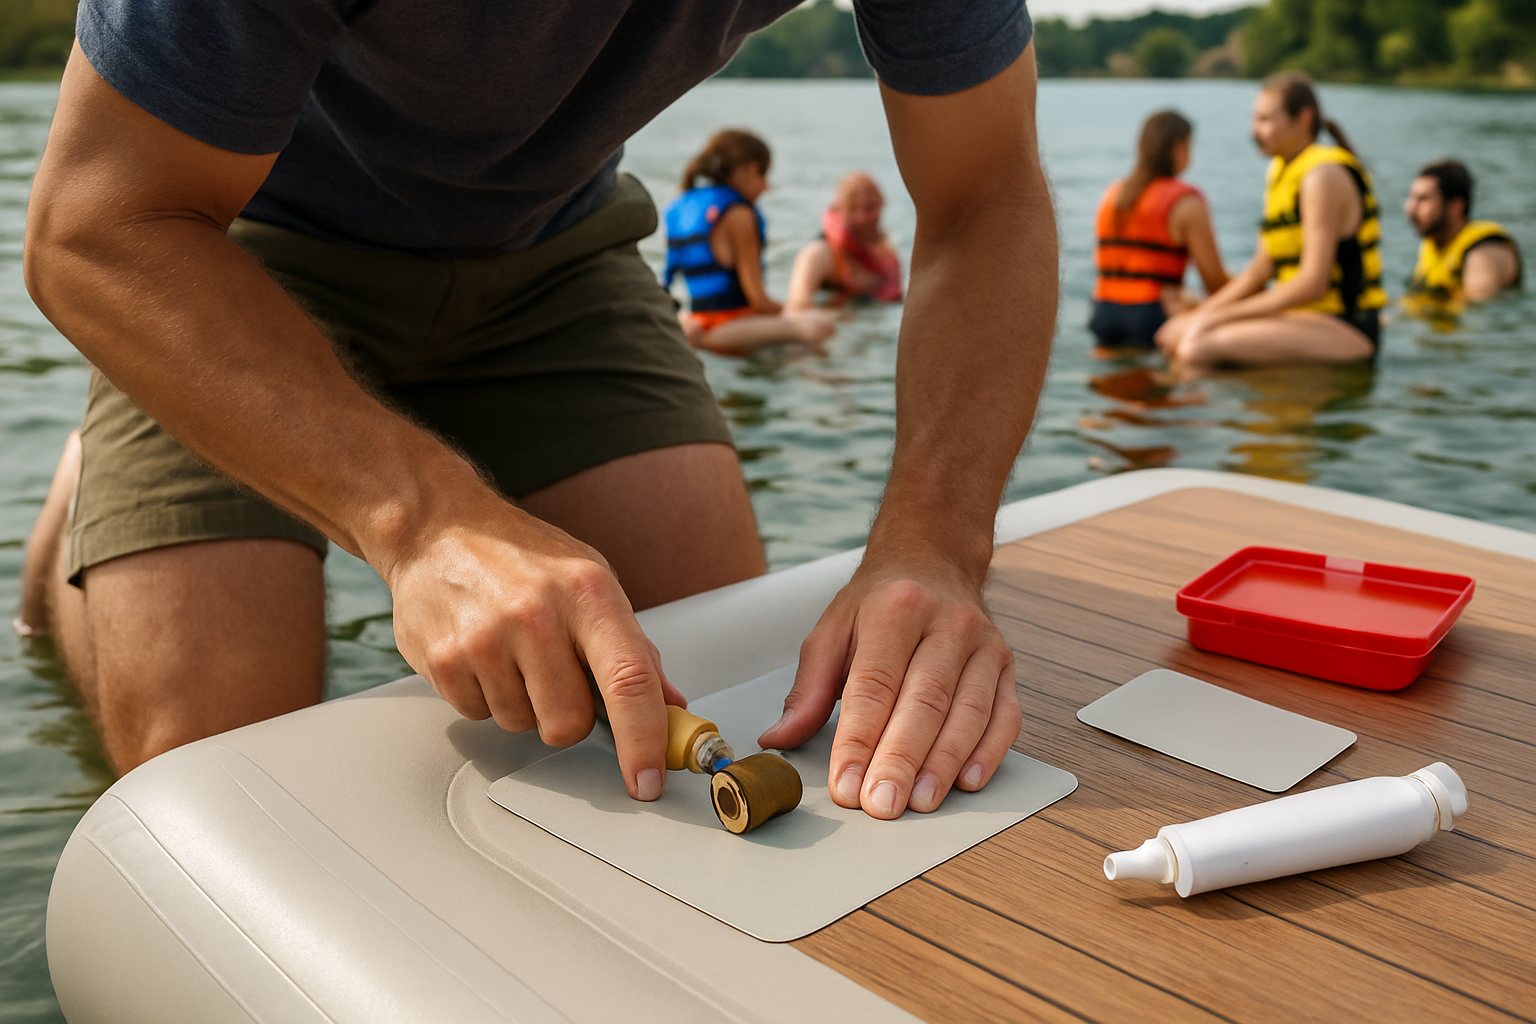
    • If it loses air, run the soapy-water test; our inflatable dock repair guide has the patch steps.
    • Check anchor lines, shackles and the anchor itself before it goes back down; RAVE’s manual asks owners to inspect for worn, defective or missing parts.
    • Re-attach anchors only to the anchor points the maker provides. RAVE’s dock has two, one at each end on the bottom, so wind can’t swing it around.

    Handy for storage day

    An electric pump with a deflate setting gets the last air out, and a repair kit stored in the dock bag means a pinhole found in spring is a ten-minute fix. These were in stock on Amazon when we checked:

    Keep in the dock bag

    JLF Repair Kit with HH-66 Vinyl Cement

    • 5 PVC patches
    • HH-66 vinyl cement
    • Valve wrench
    Check price on Amazon
    Small and light

    Stormsure SUP Repair Kit

    • TUFF Tape patches
    • Polyurethane adhesive
    • For small punctures
    Check price on Amazon

    For pumps, lines and ladders, see dock ladders and accessories. Every care guide is on our Setup and Care hub, along with inflating and installing your dock and the FAQ.

    Storage and winterizing questions

    Can I store an inflatable dock inflated?

    For the off-season, the makers we checked say to deflate it: Aquaglide says to deflate completely before folding, and RAVE says it is best to deflate and fold the dock for storage after use.

    Can an inflatable dock stay in a cold garage over winter?

    Check your manual. Aquaglide says never to store its products below 40 °F (4 °C) or in a damp place, so an unheated garage in a cold climate may not qualify.

    How do I keep mice and muskrats away from my dock?

    On the water, RAVE suggests keeping full pressure and taking the dock out at night. In storage, Aquaglide suggests a sealed closet, crate or container.

    Do I need to winterize a floating dock?

    An inflatable dock should simply come out, be cleaned and dried, and be stored indoors. For rigid floating docks, Connect-A-Dock recommends removal where ice shifts, and EZ Dock recommends removal in severe ice conditions.

    Should I use a protectant before storing?

    Aquaglide recommends cleaning the product and considering a UV protectant before storage, and applying one regularly through the season. Avoid petroleum-based cleaners.

  • Inflatable Dock Repair: Find and Fix a Leak the Right Way

    Inflatable Dock Repair: Find and Fix a Leak the Right Way

    You tied the dock off last night firm as a tabletop, and this morning one corner is sitting low in the water while the coffee goes cold. A soft dock is usually a small fix: a pinhole from a sharp rock, a fishing hook, or a valve that needs a quarter turn. This guide covers inflatable dock repair the way the makers describe it in their manuals: how to find the leak, how to patch PVC, why Hypalon needs a different glue, and when to stop and call the maker instead. An inflatable dock is a floating dock held up by air, so most floating dock repair on it means finding and sealing leaks in its air chambers.

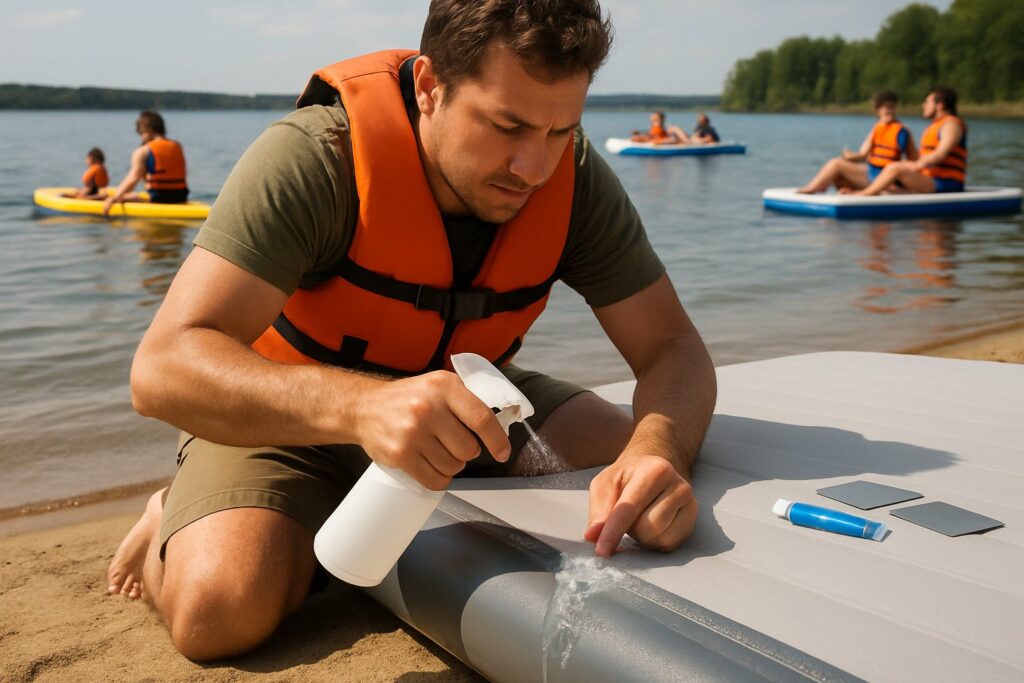
    Man spraying soapy water on an inflatable dock seam to find a leak

    In short: inflate the dock, find the leak with soapy water, deflate, clean the area with rubbing alcohol, glue on a round-cornered patch that overlaps the hole by about an inch, and let it cure for a full day before you pump it up. Use the adhesive made for your dock’s fabric: PVC glue for PVC docks (most consumer docks), Hypalon adhesive for Hypalon. Large tears, seam failures and anything that might be a defect go to the maker first.

    Before you patch: warranty and seams

    Two checks save trouble. First, warranty: Aquaglide’s repair instructions say that if you believe the product has a manufacturing defect, you should submit a warranty claim before making repairs, and a DIY patch may complicate a claim with any maker. Second, the kind of damage: RAVE’s Aqua Dock manual tells owners to contact RAVE for large holes, tears or seam failures, and to handle only minor holes and tears themselves. Seams on many docks are welded (Island Hopper says its docks have no glued edges or corners), which is factory work, not a kitchen-table repair.

    Step 1: find the leak

    1. Inflate the dock to its normal pressure on a clean, flat surface away from sharp objects.
    2. Mix mild soap in water and spray or sponge it over the deck, sides, seams and valve, a section at a time. RAVE suggests mild soapy water; Aquaglide says Windex or soapy water and a sponge.
    3. Watch for a stream of small bubbles. Check the valve and the area around D-rings and handles as well as the flat surfaces.
    4. Mark the spot with a grease pencil or tape, and note how big the hole is.

    If you find nothing and the dock still goes soft, remember that air pressure falls as the deck cools in the evening and rises in the sun. Re-check it at the same time of day before you decide it is leaking.

    Step 2: patch a PVC inflatable dock

    Most consumer docks (RAVE, Solstice, BOTE, Island Hopper, VEVOR and others) are PVC drop-stitch. RAVE’s manual gives these steps for minor holes and tears, using the patch kit that comes in the box:

    1. Cut a patch 1 to 2 in (3 to 5 cm) wider than the hole, with all corners rounded. (Aquaglide’s instructions are similar: cover 1 in beyond the leak in every direction, corners rounded to about 1/4 in.)
    2. Deflate the dock.
    3. Clean the patch and the area around the hole with rubbing alcohol, and let both dry completely.
    4. Read and follow the warnings on the glue, and work somewhere ventilated.
    5. Apply glue to the patch and the area around the hole, and let it dry until tacky to the touch (RAVE: about 30 seconds; Aquaglide: 30 to 60 seconds, until the surface glazes slightly).
    6. Lay the dock on a flat, hard surface, place the patch, and rub out air bubbles working from the center to the edges.
    7. Let the patch dry for 24 hours before inflating.

    Then inflate to pressure and run the soapy-water test again over the patch. If bubbles still appear, peel and redo it rather than stacking a second patch on top.

    PVC vs Hypalon: use the right adhesive

    Some docks, mostly on yachts, use Hypalon (CSM rubber) instead of PVC. Henshaw’s superyacht jet ski docks, for instance, have a Hypalon tube base under a drop-stitch top. The two fabrics need different glues. Polymarine, a UK maker of inflatable boat adhesives, says it is “very important to use the correct adhesive” for PVC or Hypalon, and its Hypalon adhesive guide states that the Hypalon glue is not for plasticised PVC.

    PVC dockHypalon dock or tube
    How to tell (Polymarine)Same color both sides; stays glossy when sanded; feels tacky after a light solvent wipeDark grey or black on the inside (look through the valve); sands to a matte, suede-like nap
    AdhesivePVC adhesive (for example the vinyl cement in a PVC patch kit)Hypalon adhesive; Polymarine uses a two-part glue for permanent repairs and calls its one-part tube an emergency fix
    Surface prepClean; Polymarine says don’t sand PVCSand lightly until it looks like suede, then clean with Hypalon solvent
    CureRAVE: 24 hours before inflatingPolymarine: at least six hours to dry; full cure 48 hours per its product sheet

    Polymarine’s two-part Hypalon method is more involved: mix the adhesive with its curative at 25 to 1 and use it within four hours, don’t glue in humid air (it “blooms,” turning slightly white, and must be removed), paint a thin first coat and let it dry at least 30 minutes, add a second coat to both surfaces and wait until tacky (5 to 15 minutes), then press the patch down hard from the middle out. Damage over 75 mm in any direction needs an inside patch as well as an outside one. The solvents involved are very flammable, so work outdoors or with good ventilation and no flames.

    Valve leaks

    If the bubbles come from the valve, it may only need cleaning and tightening. Many docks use H3-style high-pressure valves like those on paddle boards. Check that the stem is in the closed position (on RAVE’s dock you depress the stem and rotate a quarter turn to lock it open or closed), clear any sand from the seal, and if the valve body itself is loose, tighten it with the valve wrench your maker specifies. Replacement valves and parts come from the maker or its distributor; Aquaglide’s manual sends owners to its distributor or website for valves, handles and rings.

    Repair kits worth keeping in the dock bag

    Your dock’s own kit is the first choice because it matches the fabric. As spares for PVC docks, these were in stock on Amazon when we checked:

    PVC patches and glue

    JLF Repair Kit with HH-66 Vinyl Cement

    • 5 PVC patches, 3 x 6 in
    • 1 oz HH-66 vinyl cement
    • 6-prong valve wrench
    Check price on Amazon
    Small field repairs

    Stormsure SUP Repair Kit

    • TUFF Tape strip and patches
    • Polyurethane adhesive tubes
    • Sold for paddle boards
    Check price on Amazon

    The JLF kit’s patches are thick PVC raft material and the listing says its wrench fits 6-prong valves (check yours before relying on it). Stormsure’s kit is a quick, flexible fix sized for small punctures. Neither is Hypalon adhesive; for a Hypalon dock, follow your maker or a Hypalon-specific product.

    Avoiding the next leak

    • Carry, don’t drag. RAVE’s manual repeats it: always carry the dock to the water.
    • Inflate on a clean surface, free of rocks and sticks.
    • Keep it firm on the water. RAVE warns that muskrats may chew PVC; keeping full pressure or taking the dock out at night helps.
    • Don’t over-inflate. Stay within the maker’s pressure (RAVE: never beyond 5 psi on its dock).
    • Store it well. Clean, dry and out of the sun; see how to store an inflatable dock.

    More care guides live on our Setup and Care hub, including inflation and maintenance tips. To understand the fabric you’re patching, read drop-stitch docks explained; for spare pumps, lines and ladders, see dock ladders and accessories.

    Inflatable dock repair questions

    How do I find a slow leak in an inflatable dock?

    Inflate it fully and go over every surface, seam and the valve with soapy water, watching for bubbles. Re-check pressure at the same time of day, since temperature alone changes it.

    What glue do I use on an inflatable dock?

    The adhesive for its fabric. Most consumer docks are PVC and take PVC adhesive, usually supplied in the dock’s repair kit. Hypalon needs Hypalon adhesive; Polymarine says its Hypalon glue is not for plasticised PVC.

    How long before I can inflate after patching?

    RAVE says 24 hours for a PVC patch on its dock. Polymarine gives at least six hours to dry for a two-part Hypalon patch and 48 hours for a full cure.

    Can I fix a leaking seam myself?

    Makers generally say no. RAVE asks owners to contact it for seam failures, large holes and tears, and Aquaglide asks for a warranty claim before repairs if you suspect a defect.

    Can I patch a dock while it’s in the water?

    Not properly. The steps in RAVE’s manual call for a deflated dock, a clean and fully dry surface, and a flat, hard work surface, followed by a day of curing.

  • Inflatable Dock Weight Capacity Explained: What the Numbers Mean

    Inflatable Dock Weight Capacity Explained: What the Numbers Mean

    Late afternoon, the whole crew swims over to the dock at once: four adults, three kids and a dog, everyone climbing up the same side. The deck dips at that corner and someone asks the obvious question: how many of us can this thing actually hold? The answer is on the label, but it isn’t always one number. This guide explains inflatable dock weight capacity: the three kinds of figures makers publish, why they disagree, what “heavy duty” really means, and how to use them without guessing. Like any floating dock, an inflatable dock’s rated capacity depends on how much water it can displace before the deck sits too low.

    In short: makers state capacity in one of three ways: a weight in pounds (sometimes called a load rating), a people count, or both tied to a specific pressure. They are not interchangeable, and a figure for static load is not a figure for people moving around or for a jet ski. Use the lowest figure your maker publishes for your exact model, inflated to the pressure it names, and if two sources disagree, ask the maker.

    The three ways makers state capacity

    How it’s statedExample (maker’s own figure)What it tells you
    Weight in poundsIsland Hopper: 1,000 / 1,500 / 2,000 lb load ratings for its 10 x 3, 10 x 6 and 10 x 10 ft docksA total weight; it doesn’t say how many people
    People countSolstice: 3-5 people (6 x 5 ft) up to 8-10 people (10 x 10 ft)How many people the maker expects on it, not their weight
    Both, at a set pressureRAVE: 1,800 lb, 14 users maximum; 5 psi recommended for up to 10 adults or 14 childrenThe most useful form: people, weight and the pressure that goes with them
    People and pounds togetherAquaglide Docking Station: 600 lb (3 adults + 3 children)A conservative people rating on a big deck
    Per userJobe Infinity Dock: 300 kg maximum user weightThe maker’s maximum user weight for that module

    Look at how far apart the numbers sit. Aquaglide’s Docking Station is almost 15 ft long, yet Aquaglide rates it for 600 lb, while RAVE rates its 10 x 10 ft Aqua Dock for 1,800 lb. That is not proof that one is stronger. The makers are measuring different things, with different assumptions about how people move, where they stand and how much the deck may sink or flex.

    Inflatable dock weight capacity vs people count

    A pound figure on its own invites a bad shortcut: dividing it by an average body weight. Don’t. People jump, crowd one edge and climb on from the water, and a dock that floats a static load evenly can tip or fold at one corner. That is why the best ratings come with a people count. RAVE’s manual for the Aqua Dock lists a maximum capacity of 14 users and a maximum weight of 1,800 lb, and then says that 5 psi is “a recommended inflation pressure for up to 10 adults or 14 children.” Island Hopper’s figures, by contrast, appear in listings as load ratings in pounds with no people count, so ask the maker how many people a given dock is meant to carry.

    We never work out a “safe load” from a dock’s size, and we suggest you don’t either. A larger deck doesn’t come with a proportionally higher rating (Aquaglide’s case above shows that), and nothing in the area of a deck tells you how its seams, valves or drop-stitch threads were tested. The figure that counts is the one printed on your dock and in its manual.

    Pressure is part of the rating

    A drop-stitch dock is only as stiff as the air in it. Makers state very different pressures: RAVE 5 psi for its Aqua Dock (and not to inflate beyond it), BOTE 6-8 psi for its 7 ft and 8-10 psi for its 10 ft dock, Island Hopper 8-15 psi for its Yacht Dock, and Solstice 10 psi on a dealer listing. A dock run soft will sag under the load it is rated for; one over-pressured can be damaged. Check with a gauge before people climb on, and again in the afternoon, since air expands as the deck warms in the sun. Our drop-stitch docks explained guide covers why pressure matters so much.

    When the numbers conflict

    It happens more than you’d think. BOTE’s own page lists its 10 ft Inflatable Dock at 2,100 lb, while some retailers list the same model at 1,500 lb. Solstice rates its 10 x 10 by people (8-10), while Overton’s lists it at 1,650 lb. When sources disagree, plan around the lower figure and ask the maker in writing which one applies to people on the deck. Our Solstice vs BOTE vs VEVOR comparison lays out these conflicts brand by brand.

    Docks don’t have a capacity plate

    Boaters know the capacity plate: the BoatUS Foundation explains that powered boats under 20 ft built after November 1, 1972 must display one, showing maximum persons and maximum weight, and that those limits apply in good to moderate weather (keep well below them in rough water). Inflatable boats are exempt, and inflatable docks aren’t boats, so there is no federal plate or common test standard behind their ratings. Each maker sets its own. The same caution applies, though: no consumer dock maker we checked publishes a wind or wave limit, and RAVE’s manual says never to use its dock in high winds, waves, strong currents or storms.

    What “heavy duty inflatable dock” really means

    “Heavy duty” and “military grade” appear all over listings, but neither is a defined spec; on consumer docks they are seller copy. What you can compare are the things makers actually publish:

    • Thickness: most consumer docks are 6 in; BOTE’s are 8 in; yacht docks from Jobe and Yachtbeach are 20 cm (about 8 in).
    • Fabric: Island Hopper lists a 1000-denier outer layer; Aquaglide 0.80 mm, 28 oz Duratex on its Docking Station.
    • Seams: heat-welded (Island Hopper) or welded three-layer seams (Aquaglide) versus glued.
    • Warranty and use: RAVE’s lifetime warranty is for personal use; Aquaglide gives 3 years residential but 1 year light commercial on its Half Deck.

    Heavy duty for a family is not the same as rated for work. Recreational docks are not sold for passenger boarding, rental fleets or crews with equipment, and in some places passenger landing pontoons must be certified (a 1998 circular from Singapore’s maritime authority requires it). For commercial or rescue use, see the purpose-built products on our dock types hub and use Request more information.

    Jet skis need a jet ski rating

    A people count is not a jet ski rating. A flat swim dock is not sold for parking a personal watercraft, whatever its pound figure. Purpose-built docks such as Jobe’s Infinity PWC Dock or the yacht jet ski docks in our jet ski docks guide are the ones to look at, and even then, confirm with the maker which craft and weights a dock is rated for.

    How to use a capacity rating

    • Find the rating for your exact model and size in the manual or on the label, not a listing for a similar dock.
    • Inflate to the pressure the maker ties to that rating, and check it with a gauge.
    • Use the lowest figure when sources disagree, and the people count when both are given.
    • Spread people out, climb on from different sides, and keep the deck clear of coolers that load one corner.
    • Check the water depth the maker asks for (RAVE: at least 4 ft) and keep life jackets on non-swimmers and kids.

    Two docks that publish clear ratings and were in stock when we checked:

    People and pounds

    RAVE Aqua Dock 10 x 10

    • 1,800 lb, 14 users max
    • 10 adults or 14 children at 5 psi
    • 10 x 10 ft, 6 in
    Check price on Amazon
    Load rating

    Island Hopper Yacht Dock 10 x 6

    • 1,500 lb (maker)
    • 8-15 psi
    • 10 x 6 ft, 6 in
    Check price on Amazon
    SpecRAVE Aqua Dock 10Island Hopper Mega Yacht Dock 10 x 10Aquaglide Docking Station
    Size (as stated)10 x 10 ft x 6 in10 x 10 ft14 ft 9 in x 10 ft 5 in x 6 in
    Thickness6 in drop-stitch6 in6 in (15 cm) welded drop-stitch
    Stated capacity1,800 lb / 10 adults2,000 lb load rating600 lb (3 adults + 3 children)
    Minimum water depth4 ftnot published4 ft; at least 10 ft from shore
    ConstructionDrop-stitch PVCHeat-welded PVC with EVA top0.80 mm 28 oz Duratex, 3-layer seams
    Inflation pressure5 psinot publishednot published
    Weight68 lb75 lb rollednot published
    Anchoring / attachment2 anchor pointsnot published5 anchor rings; at least 1,100 lb anchor weight; anchors, bridle and pump not included
    WarrantyLimited lifetimenot published3-year limited
    Price signalnot publishednot publishedAbout $2,530 to $2,640 at dealers
    See it at Bart'sSee it at Overton'sSee it at Bart's

    Figures as each maker states them; makers measure capacity differently. Check the product page for sources and dates.

    More reading: our Setup and Care hub, best inflatable docks, lake docks, and the terms in our glossary and FAQ.

    Capacity questions

    How much weight can an inflatable dock hold?

    It depends entirely on the model. Stated figures we found run from 265 lb (VEVOR 6 x 5 ft) and 600 lb (Aquaglide Docking Station) to 1,800 lb (RAVE 10 x 10 ft) and 2,100 lb (BOTE 10 ft, per BOTE). Use your dock’s own rating.

    Is a load rating the same as a people limit?

    No. A load rating is a total weight, often for a static, evenly spread load. A people limit accounts for how people move and gather. When a maker gives both, follow both.

    Does a bigger dock always hold more?

    No. Aquaglide’s nearly 15 ft Docking Station is rated 600 lb; RAVE’s 10 x 10 ft dock 1,800 lb. Ratings reflect each maker’s own testing and assumptions, not just area.

    What is the most heavy duty inflatable dock?

    There is no standard for “heavy duty.” Compare the published thickness, fabric, seams, stated capacity and warranty terms instead; among consumer docks, BOTE’s are thickest at 8 in, and yacht docks such as Jobe’s run 20 cm.

    Does underinflating reduce capacity?

    Makers tie their ratings to a pressure. RAVE, for example, gives 5 psi as the recommended pressure for up to 10 adults or 14 children. Below the stated pressure the deck is softer and the rating no longer reflects how it will behave, so pump to spec.

  • Floating Dock on a River: Current, Debris and Changing Water

    Floating Dock on a River: Current, Debris and Changing Water

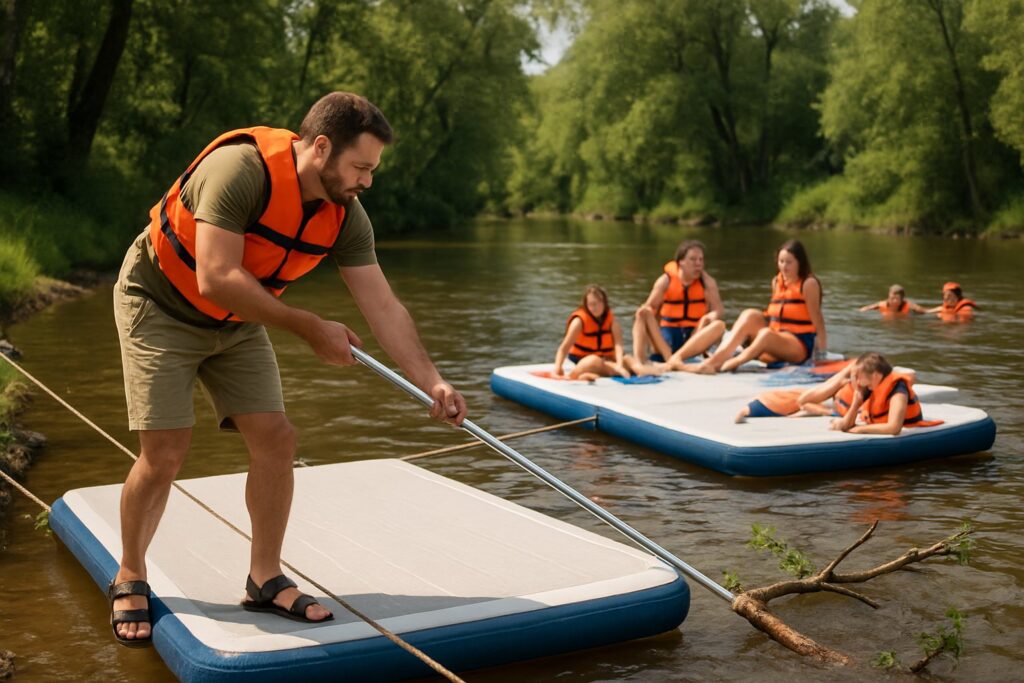
    A river house in June is hard to beat: the boat tied up out front, kids fishing off the end, the water sliding past all day. Then the spring rains come upstream, the river rises a few feet overnight, and a log the size of a canoe drifts down and lodges against the dock. A floating dock on a river lives with three things a lake dock rarely sees: constant current, floating debris and big changes in water level. This guide explains what each one means for the dock you choose, how it is held in place, the rules that apply on rivers, and when an inflatable dock is the wrong tool.

    Man clearing a floating branch from an inflatable dock on a river

    In short: on a river, use a rigid floating dock held by hardware that lets it rise and fall but not drift (pipes in collars, piling brackets or stiff arms), with a hinged gangway for level changes. Consumer inflatable docks are a poor fit for current: RAVE tells owners not to use its dock in currents, and Aquaglide says sites with strong currents should consider up to 50% more anchor weight. States such as Iowa and Illinois require river docks to be securely anchored so they do not become floating hazards in high water. Check federal, state and local rules before you install.

    Why a floating dock on a river is different

    • Current never stops. On a lake, wind loads a dock now and then. On a river, the water pushes on it all the time, and harder when the river is high.
    • Debris arrives with the current. Branches, logs and trash catch on the upstream edge, add load and can puncture or scrape.
    • The level moves. Rivers can rise and fall several feet with rain upstream or dam releases, so lines and gangways that fit in the morning can be too short or too long by evening.
    • Ice moves too. Where rivers freeze, ice shifting in the thaw is what damages docks; Candock says most ice damage happens then.

    Inflatable docks and river current

    We like inflatable docks on lakes and at anchor, but we are cautious about them on moving water, and the makers are too. RAVE’s owner’s manual for its Aqua Dock tells users never to use it in high winds, waves or currents, and not to connect it directly to docks, piers or other hard objects. Aquaglide, writing about its anchored lakefront products, says sites with strong tides, currents, winds or swell should consider up to 50% more weight or holding power. None of the consumer dock makers we checked publishes a current, wind or wave limit, so there is no number to work to.

    If you use an inflatable on a river at all, keep it to slack water: a backwater, a still side channel or a cove where the current is barely moving, on a calm day, attended, and out of the water when the river is up. For a dock that lives on the river all season, look at rigid docks.

    Holding a river dock in place

    River docks are usually held by hardware that controls sideways movement while letting the dock float up and down. EZ Dock lists pipes, deadweight anchors, piling brackets and stiff arms as its anchoring options, with hardware for fresh and salt water.

    MethodHow it worksRiver notes
    Pipes in collarsPipes set in the bottom pass through collars on the dock (Connect-A-Dock kits have pole anchoring connectors for Schedule 40 pipe)Pipe length must cover the high-water mark; best in shallower water
    Piling bracketsBrackets slide on fixed pilingsPilings are a construction job and often need a permit
    Stiff armsRigid arms hinge between shore and dockHold the dock off the bank as the level changes
    Deadweights and linesHeavy weights on the bottom with lines or chainLines must be long enough for high water without letting the dock swing into the bank or channel

    Rigid modular docks are designed with wave loads in mind: EZ Dock says its couplers are designed to break before the dock section in strong wave action, so the repair is a coupler, not a section. Ask the dealer to size the anchoring for your river, depth and current, and get it in writing.

    Planning for rising and falling water

    • Know your range. Find the nearest US Geological Survey streamgage and look at its history. USGS WaterAlert sends email or text notifications when water conditions cross thresholds you choose, which is a simple way to know when to check the dock.
    • Hinge the gangway. A gangway hinged at both ends follows the dock up and down; EZ Dock offers wood, polyethylene (up to 18 ft) and aluminum gangways.
    • Check low water too. Make sure the dock still floats at the lowest level you expect and does not settle onto rocks.
    • Have a high-water plan. Know in advance whether you will pull the dock, swing it in to the bank or leave it; Iowa makes riparian owners responsible for retrieving a dock that becomes a navigation hazard.

    Debris and inspections

    After every rise, walk the dock: clear branches from the upstream side, look at lines, chain and shackles for chafe, and check couplers, cleats and nuts. Candock, for example, asks owners to check the nuts on cleats, ladders and connecting pins occasionally. Keep a repair kit for anything soft on the dock, such as an inflatable swim pad or fenders. Never go out on a dock in flood: the National Weather Service warns that 6 in of fast-moving flood water can knock over an adult.

    Long line for high water

    Better Boat 3/8 in Nylon Anchor Line, 100 ft

    • 820 lb working load
    • 4,035 lb breaking load
    • Stainless thimble
    Check price on Amazon
    Shock cord and chain

    RAVE Sports Anchor Connector Kit

    • 6 ft shock cord
    • 15 ft nylon rope
    • Galvanized chain, float
    Check price on Amazon
    Patch kit

    JLF Inflatable Repair Kit with HH-66 Cement

    • Five PVC patches
    • 1 oz vinyl cement
    • Valve wrench
    Check price on Amazon

    River dock permits and rules

    Rivers are more likely than ponds to be navigable waters. In US navigable waters, the Army Corps of Engineers treats piers and boat docks as structures that need a Department of the Army permit unless they are exempt or covered by a general permit. States add their own rules, and some are written with rivers in mind:

    • Iowa: “All river docks must be securely anchored to prevent them from becoming floating hazards during times of high river flows,” and the riparian owner is responsible for retrieving and removing a dock when needed to prevent or remove a navigation hazard.
    • Illinois: its statewide permit for minor private docks requires a dock to be securely anchored against high water or winds, to project no more than 50 ft and never more than a quarter of the waterway’s width, to stay within navigation limits, and to be no more than 10 ft wide.

    These are examples, not your rules. Check with your state natural resources agency, county, any river authority or water management district, and the Corps district office before you buy.

    Choosing a dock for a river

    • Tell the dealer it is for a river, with the depth range and how fast the current runs at your bank.
    • Prefer rigid modular sections with river-rated anchoring over a single inflatable deck.
    • Keep it short and close to the bank; the rules above limit how far you may reach into the channel.
    • Plan to remove it before ice moves, as Connect-A-Dock recommends where ice shifts.
    Custom built: request information

    FunAir Toy Island

    by FunAir

    • Stated capacity: Up to 4 jet skis or dinghies, or 2 Seabobs plus guests (maker)

    Full specs and sources

    Request more information

    Jobe Infinity Dock

    by Jobe

    • Size (as stated): 250 x 233 cm
    • Stated capacity: 300 kg maximum user weight
    • Thickness: 20 cm

    Full specs and sources

    See it at Nootica

    Jobe Infinity PWC Dock

    by Jobe

    • Size (as stated): 345 x 250 cm
    • Thickness: 20 cm

    Full specs and sources

    See it at Nootica
    Custom built: request information

    NautiBuoy Jet-Ski Dock

    by NautiBuoy Marine

    Full specs and sources

    Request more information

    Northern Diver FloatDeck

    by Northern Diver

    • Size (as stated): 1 to 10 m lengths
    • Thickness: 8 cm drop-stitch

    Full specs and sources

    See it at Northern Diver

    Related: how to anchor a floating dock, floating dock installation, floating dock kits vs inflatable docks, the modular docks hub and the Setup and Care guide.

    River dock questions

    Can I put an inflatable dock on a river?

    Only in slack water, and check your manual first. RAVE says not to use its inflatable dock in currents, and no consumer maker we checked publishes a current limit.

    How do floating docks handle river level changes?

    They float up and down, so the anchoring has to slide or flex with them: pipes through collars, brackets on pilings, stiff arms, or lines with enough length. A hinged gangway connects the moving dock to the fixed bank.

    Should I take my river dock out before a flood?

    If you can do it safely before the water rises, it is often the simplest way to protect the dock and keep it from becoming a hazard downstream. Once the water is up and fast, stay off it.

    Do I need a permit for a floating dock on a river?

    Often. Many rivers are navigable waters under federal rules, and states such as Iowa and Illinois set conditions for river docks. Check before you install.

  • Floating Dock Installation: Step by Step, Inflatable and Rigid

    Floating Dock Installation: Step by Step, Inflatable and Rigid

    Memorial Day weekend, the water still cold, and the new dock is on the lawn in boxes. By Sunday evening you want to be sitting on the end of it with your feet in the lake. Good floating dock installation is mostly planning: knowing your depth, bottom and rules before the first piece touches the water, then following the maker’s order of work. This guide walks through installing an inflatable dock and a rigid modular dock kit, the tools each needs, connecting to shore, the first-week checks and taking it out in the fall.

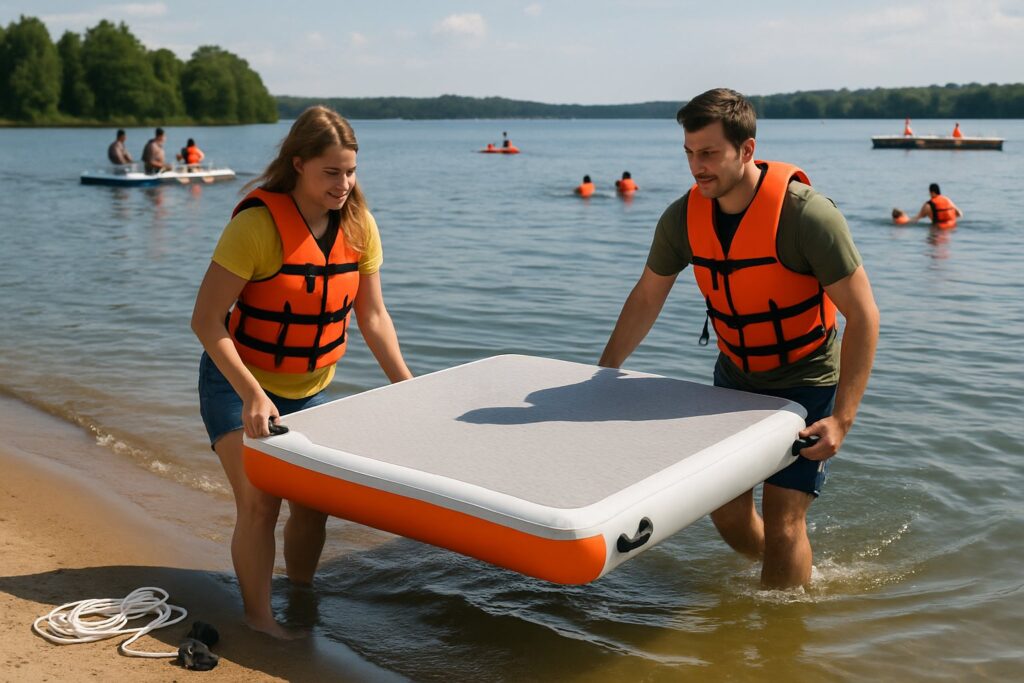
    Two people guiding a freshly inflated dock into shallow water

    In short: check permits, depth and bottom first. An inflatable dock is inflated on a clean, flat surface to the maker’s pressure, carried (not dragged) to the water and anchored at every anchor point, away from piers and boats. A rigid kit is assembled section by section with couplers or connectors, pinned with pipes or anchored with weights, piling brackets or stiff arms, and joined to shore with a gangway. EZ Dock says most of its docks go in within a day with two people; Aquaglide recommends a dock and mooring specialist for its large anchored docks.

    Before installation: rules, depth and bottom

    • Rules. In US navigable waters, the Army Corps of Engineers counts boat docks and piers as structures that need a Department of the Army permit unless exempt or covered by a general permit. States add their own: Minnesota’s DNR lets many docks go in without a state permit if they meet conditions such as width and use, and leaves more to local rules; Illinois covers small private docks with a statewide permit that limits length, width and setbacks. Utility and reservoir lakes often have their own shoreline permits.
    • Depth. Measure at the lowest water you expect, not today’s. RAVE and Aquaglide ask for at least 4 ft under their inflatable docks.
    • Distance. Aquaglide’s Docking Station must sit at least 10 ft from shore. Leave room for the dock to swing on its lines.
    • Bottom. Sand, mud, weed or rock decides the anchor; see how to anchor a floating dock.
    • Neighbors and traffic. Keep clear of channels, swim areas and the property line.

    Tools and parts

    Inflatable dockRigid dock kit
    Pump with a gauge (hand pump usually included; electric saves time)EZ Dock: in-water coupler tool, coupler nut tool, hammer, ratchet, 15/16 in wrench or socket, Phillips screwdriver
    Anchors to the maker’s total weight, lines, shackles or carabiners, a bridle if the dock has several ringsAnchoring pipe (Connect-A-Dock’s kit leaves out the Schedule 40 pipe), or weights, piling brackets or stiff arms
    Repair kit, ground sheet or tarpGangway or gangway hinge, cleats, bumpers
    Two or more people to carryA helper (two or more people recommended), a boat or waders

    Installing an inflatable dock

    1. Set the anchors first. Aquaglide’s manuals say to install anchors and mooring lines before inflating. Lower weights into place from a boat and mark them with a float.
    2. Unroll on a clean, flat surface. RAVE says to inflate on flat ground clear of sharp objects, or on the flat deck of a boat with the motor off.
    3. Inflate to the stated pressure and no more. RAVE’s Aqua Dock is 5 psi (“do not inflate beyond 5 psi”); BOTE gives 6 to 8 psi for its 7 ft dock and 8 to 10 psi for the 10 ft; other docks run up to about 15 psi. Island Hopper says its 10 x 6 ft dock takes about 8 minutes with the hand pump. An electric pump with auto-stop takes the effort out.
    4. Carry it to the water. RAVE says two or more people should carry an inflated dock and that you should not drag it.
    5. Attach to every anchor point and set the line length so the dock floats flat with a little slack.
    6. Keep it off hard objects. RAVE’s manual says not to connect its dock directly to docks, piers or other hard objects. Anchor it on its own, a swim away from the pier.
    Electric pump

    AIRBANK Puffer Pro Electric Pump

    • Up to 20 psi
    • Auto-off at set pressure
    • 7 nozzles
    Check price on Amazon
    Repair kit

    JLF Inflatable Repair Kit with HH-66 Cement

    • Five 3 x 6 in PVC patches
    • 1 oz vinyl cement
    • Valve wrench
    Check price on Amazon
    Lines

    Better Boat 3/8 in Nylon Anchor Line, 100 ft

    • 820 lb working load
    • Double-braided nylon
    • Stainless thimble
    Check price on Amazon

    Before you buy a pump, check that one of its nozzles fits your dock’s valve. Several docks we looked at use an H3 high-pressure valve (Solstice and Overton’s), and the JLF kit’s wrench fits 6-prong valves only, so check yours.

    Installing a rigid floating dock kit

    1. Lay out the sections near the water in the order they will go, with the gangway end nearest shore.
    2. Join sections in the water. EZ Dock uses rubber couplers set with its in-water coupler tool; Connect-A-Dock’s kit has float connectors; Candock cubes screw together. Work outward from shore.
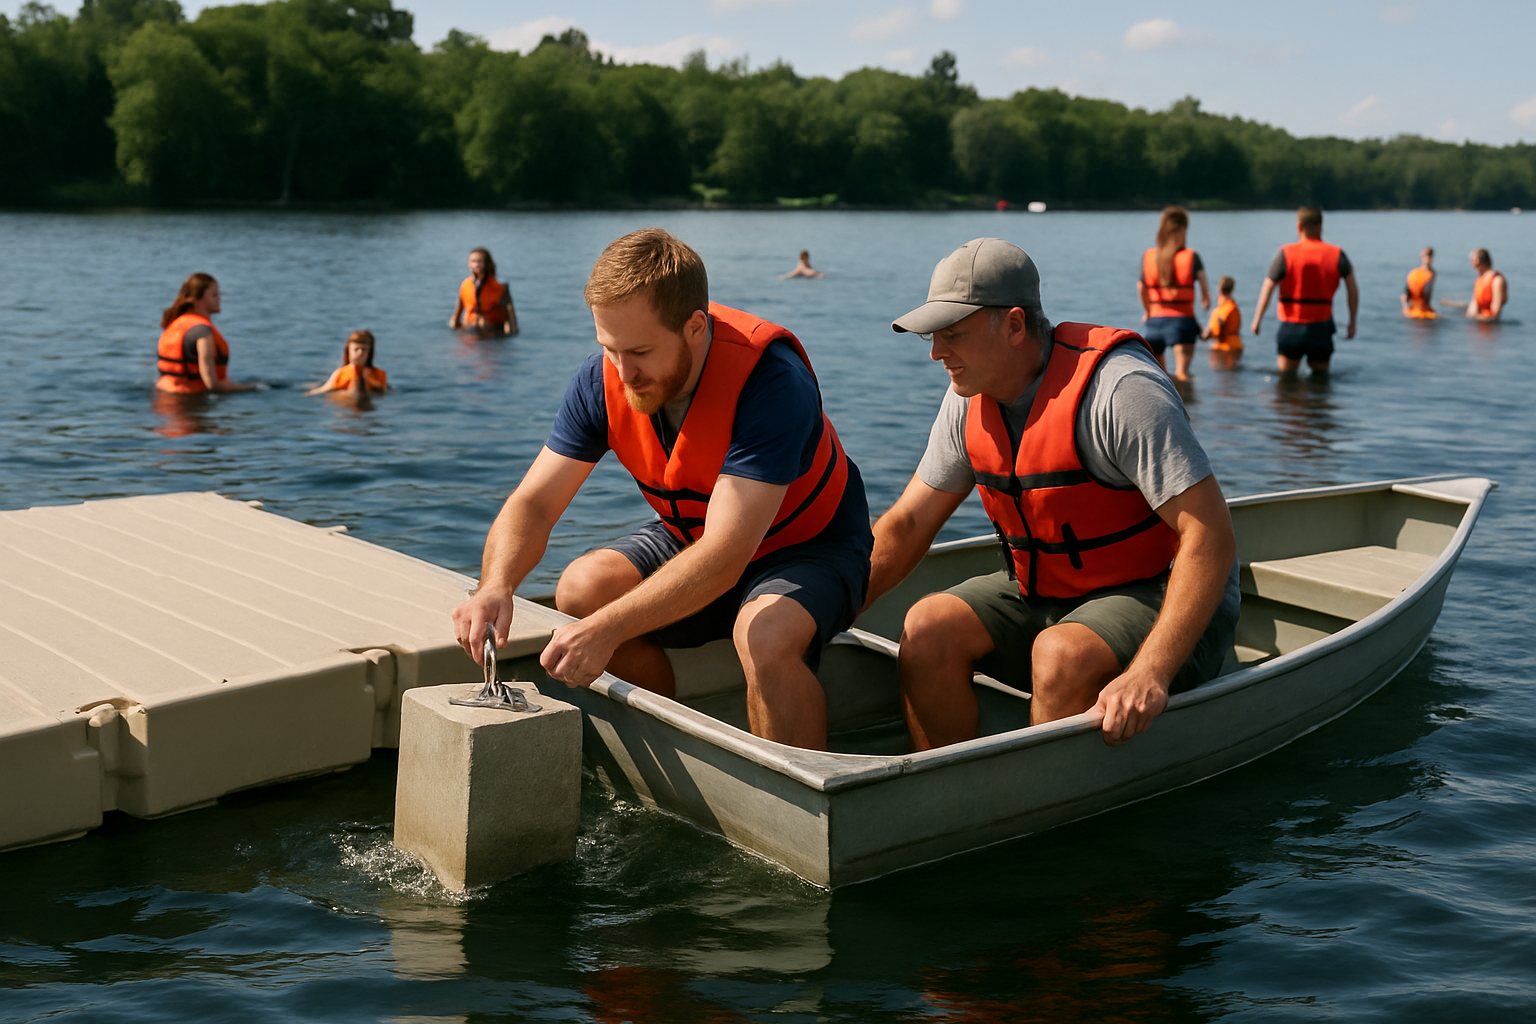
    3. Anchor as you go. Drive pipe through the pole anchoring connectors in shallow water, or fit deadweights, piling brackets or stiff arms as the dealer advises. The dock must still rise and fall.
    4. Connect to shore. Fit the gangway hinge and gangway. EZ Dock offers a hardware kit for a wooden gangway built from 2 x 12 boards, polyethylene gangways up to 18 ft, and aluminum ones.
    5. Add accessories such as cleats, bumpers, a ladder, a PWC port or a kayak launch, using the maker’s connectors.

    EZ Dock says most docks can be installed in a day with you and a helper, or its dealers can deliver and install. Connect-A-Dock’s seller says its kit installs with simple hand tools and that one person can do it, though two or more are recommended. Heavy add-ons ship by freight; Wave Armor says its Sport jet ski port needs a forklift for delivery.

    DIY or hire a pro?

    A 10 ft inflatable and a short straight kit are reasonable DIY jobs for two people. Call a professional when the anchoring is heavy or the site is hard: Aquaglide advises a dock and mooring specialist for its Docking Station (1,100 lb minimum anchor weight) and C Lounge (4,400 lb). Get dealer quotes itemized, because prices are not always all-in; one dealer we checked listed its price as excluding installation, anchoring equipment and shipping. See floating dock cost for typical prices.

    The first week

    • Check position after the first hour and the first windy afternoon; add weight if it moved.
    • Check inflatable pressure in the morning and in the afternoon sun; warm air expands.
    • Tighten couplers, nuts and cleats on rigid docks; Candock tells owners to check nuts on cleats, ladders and pins occasionally.
    • Walk the lines for chafe where they pass edges.

    Taking it out for the season

    For inflatables, RAVE’s manual says to bring the dock to land or deflate it on a boat deck, dry each side in the sun for at least 15 minutes, towel it dry, fold it in thirds and roll it loosely, then store it in a covered, shaded, cool, dry place off concrete and safe from rodents. Clean it with mild soap and fresh water, never solvents or a power washer. For rigid docks, Connect-A-Dock recommends removal for winter where ice shifts, and Candock says ice damage usually comes from ice moving in the spring thaw. Mark where your anchors are so next spring goes faster.

    Aquaglide Docking Station

    by Aquaglide

    • Size (as stated): 14 ft 9 in x 10 ft 5 in x 6 in
    • Stated capacity: 600 lb (3 adults + 3 children)
    • Thickness: 6 in (15 cm) welded drop-stitch

    Full specs and sources

    See it at Bart's

    BOTE Inflatable Dock 10 Classic

    by BOTE

    • Size (as stated): 10 x 10 ft x 8 in
    • Stated capacity: 2,100 lb on BOTE's site (1,500 lb at some retailers)
    • Thickness: 8 in

    Full specs and sources

    See it at BOTE

    BOTE Inflatable Dock 7 Classic

    by BOTE

    • Size (as stated): 7 x 7 ft x 8 in
    • Stated capacity: 1,050 lb
    • Thickness: 8 in

    Full specs and sources

    See it at BOTE

    Island Hopper Mega Yacht Dock 10 x 10

    by Island Hopper

    • Size (as stated): 10 x 10 ft
    • Stated capacity: 2,000 lb load rating
    • Thickness: 6 in

    Full specs and sources

    See it at Overton's

    RAVE Aqua Dock 10

    by RAVE Sports

    • Size (as stated): 10 x 10 ft x 6 in
    • Stated capacity: 1,800 lb / 10 adults
    • Thickness: 6 in drop-stitch

    Full specs and sources

    See it at Bart's

    Solstice Inflatable Dock 10 x 10

    by Solstice Watersports

    • Size (as stated): 10 x 10 ft x 6 in
    • Stated capacity: 1,650 lb
    • Thickness: 6 in drop-stitch

    Full specs and sources

    See it at Overton's

    More in Setup and Care: how to anchor a floating dock, floating docks on rivers, floating dock kits vs inflatable docks and our older guide to inflating and installing a boat dock. Common questions are in the FAQ.

    Installation questions

    How long does floating dock installation take?

    An inflatable takes minutes to inflate (about 8 minutes by hand for Island Hopper’s 10 x 6 ft dock, by the maker’s figure) plus the time to set anchors. EZ Dock says most of its rigid docks go in within a day with two people.

    Can I install a floating dock by myself?

    Plan on two people. RAVE says two or more should carry an inflated dock, and Connect-A-Dock’s seller recommends two or more for its kit even though one person can do it.

    Can I attach an inflatable dock to my existing dock?

    RAVE says not to connect its dock directly to docks, piers or other hard objects, and Aquaglide says never to tie its lakefront products to a dock. Anchor the inflatable separately.

    What water depth do I need?

    At least what the maker states, measured at low water: 4 ft for the RAVE and Aquaglide docks we checked. Rigid docks vary by system; ask the dealer.

    Do I need a permit to install a floating dock?

    Sometimes. Federal rules apply in navigable waters, and states, counties and lake authorities have their own. Call before you buy, not after it is in the water.

  • How to Anchor a Floating Dock: Anchors, Weights, Lines, Bridles

    How to Anchor a Floating Dock: Anchors, Weights, Lines, Bridles

    The first afternoon breeze on a lake is the test. A dock that was sitting nicely off the beach at breakfast starts to swing, drags a little, and by three o’clock it is nosing into the neighbor’s lift. Many floating dock problems come back to the same thing: anchoring a floating dock properly, with enough weight, the right lines and the right spot. This guide covers how to anchor a floating dock, inflatable or rigid, using the figures makers actually publish, and it tells you where they publish nothing.

    In short: follow your maker’s numbers first. Aquaglide asks for at least 1,100 lb of total anchor weight on its Docking Station and 4,400 lb on its C Lounge; RAVE suggests about 150 to 200 lb for its 10 x 10 ft Aqua Dock, depending on the lake and bottom. Use anchors suited to your bottom, lines with enough scope (boating guides use 5:1 to 7:1 for boats), a bridle where the dock has several anchor rings, and keep the dock away from piers, boats and other hard objects. Rigid docks are pinned with pipes, deadweights, piling brackets or stiff arms.

    Start with what your dock maker says

    Makers publish very different anchoring figures, because their docks are very different. These are the ones we found, as the makers state them:

    DockAnchor pointsAnchor weightDepth and distance
    Aquaglide Docking Station (14 ft 9 in x 10 ft 5 in)5 anchor ringsAt least 1,100 lb (500 kg) totalAt least 4 ft deep, 10 ft from shore
    Aquaglide C Lounge (14.7 ft)4 anchor ringsAt least 4,400 lb (2,000 kg) totalAt least 4.8 ft deep, 3.3 ft from shore
    RAVE Aqua Dock 10 (10 x 10 ft)2, one at each end on the bottomAbout 150 to 200 lb, depends on lake and bottom (RAVE FAQ)At least 4 ft deep
    Rigid sections (EZ Dock, Connect-A-Dock)Pipe collars, pole connectors, bracketsSet by dealer for the siteSite specific

    Two things stand out. First, Aquaglide’s figures are far higher than most owners expect, and Aquaglide says its weight recommendations are for anchoring in extreme weather, waves or other abnormal conditions, and advises a dock and mooring specialist for the install. Second, no consumer dock maker we checked publishes a wind or wave limit. That is why the maker’s anchor weight is the number to respect, and why you should bring the dock in, or stay off it, when weather turns.

    Floating dock anchors: the main types

    • Deadweight anchors. Anything heavy that sits on the bottom: concrete blocks, filled anchor bags or purpose-made weights. Aquaglide’s Lakefront Anchor Bag holds about 110 lb (50 kg) when filled with sand, and several bags can share one line to reach a large total.
    • Mushroom anchors. Cast bowls that settle into soft bottoms. A 10 lb SeaSense mushroom is sold for sandy, muddy or weedy bottoms and small boats; on its own it is far below the totals above, so it suits small, light setups or as one of several anchors.
    • Pipes and poles. For rigid kits in shallow water: Connect-A-Dock’s kit has pole anchoring connectors for Schedule 40 pipe (not included), and the dock slides up and down the pipe as the water changes.
    • Stiff arms and piling brackets. Rigid arms from the shore or brackets on pilings that hold the dock in place while letting it rise and fall. EZ Dock lists pipes, deadweight anchors, piling brackets and stiff arms as its options, with fresh and saltwater hardware.

    Match the anchor to the bottom. The BoatUS Foundation notes that lightweight fluke anchors hold best in hard sand or mud, not in very soft mud or grass, and that plow anchors work in sand, rock, weeds and grass but poorly in soft bottoms. For a dock that stays put for weeks, deadweight is the usual answer, because it does not depend on digging in.

    Lines, scope and chain

    Scope is the length of line compared with the depth of water. For anchoring boats, the BoatUS Foundation teaches 7:1, or 5:1 for a small boat with a light anchor in good weather, and a state boating course adds 7 to 8 ft of galvanized chain at the anchor end to lower the angle of pull. Docks are moored rather than anchored like boats, and makers set their own line arrangements, but the idea holds: a short, steep line lifts the anchor; a longer line with some chain keeps it on the bottom. Allow for the dock swinging in a circle and keep that circle clear of swimmers’ routes, boats and other docks.

    Use marine line rated well above the load. Better Boat’s 3/8 in double-braided nylon, for example, lists an 820 lb working load and a 4,035 lb breaking load. The working load is the figure to plan with. A shock cord near the dock absorbs movement and stress; RAVE sells an anchor connector kit with a 6 ft shock cord, 15 ft of nylon rope, galvanized chain and a foam float.

    Small extra anchor

    SeaSense Mushroom Anchor 10 lb

    • Vinyl-coated cast iron
    • Sandy, muddy, weedy bottoms
    • About $32
    Check price on Amazon
    Anchor line

    Better Boat 3/8 in Nylon Anchor Line, 100 ft

    • 820 lb working load
    • 4,035 lb breaking load
    • Stainless thimble
    Check price on Amazon
    Shock-absorbing connector

    RAVE Sports Anchor Connector Kit

    • 6 ft shock cord
    • 15 ft nylon rope, chain
    • Foam marker float
    Check price on Amazon

    What a bridle does

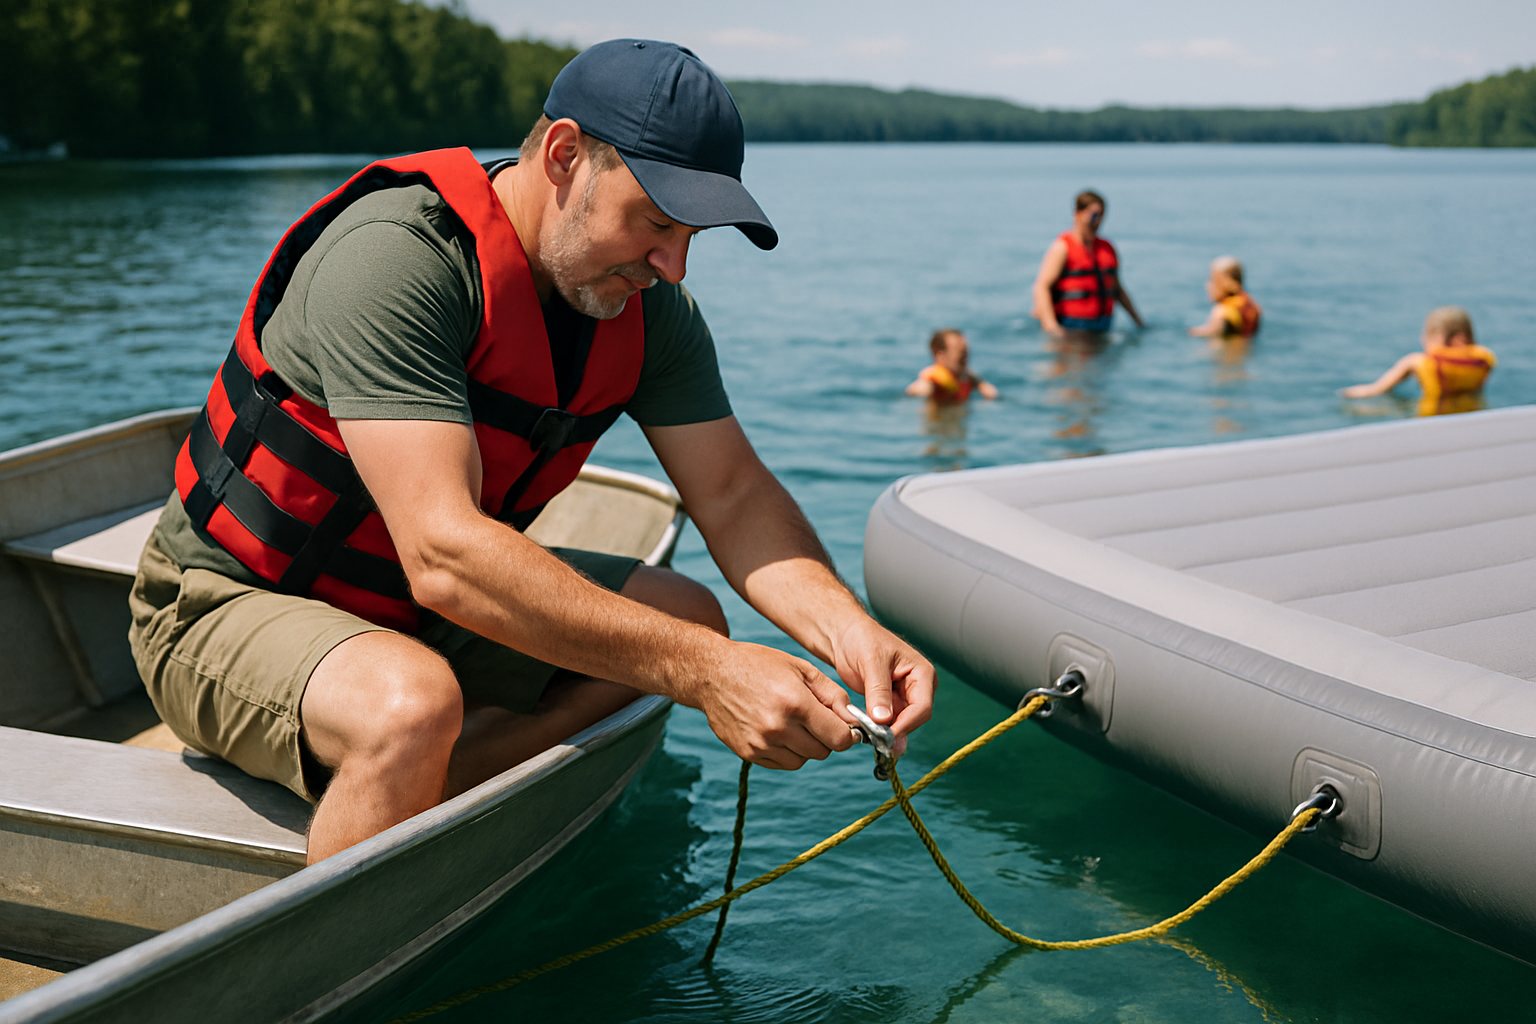
    A bridle is a set of short lines that run from several anchor rings on the dock to one point, often a swivel, where the main anchor line attaches. It spreads the pull across the dock instead of yanking one corner, and the swivel lets the dock turn with the wind without twisting the line. In one of its lakefront manuals, Aquaglide describes a single vertical mooring line to the center swivel of a 4-way bridle with an appropriate weight, and tells owners to secure the swivel and connections so they cannot loosen in rough weather. Aquaglide’s Docking Station has five anchor rings and ships without a bridle, so buy or make one rated for the job.

    How to anchor a floating dock, step by step

    1. Read the manual. Note the anchor weight, anchor points, minimum depth and distance from shore.
    2. Pick the spot. Check depth with a weighted line at the lowest water you expect, and leave room for the dock to swing clear of piers, lifts, boats and swim lanes.
    3. Place anchors first. Aquaglide’s instructions say to install anchors and mooring lines before inflating its product. Lower weights from a boat; never throw them.
    4. Attach the bridle or lines to every anchor point the maker provides, using shackles or locking carabiners.
    5. Set the length so the dock floats flat at today’s level with some slack for waves and level changes.
    6. Check after an hour and after the first wind. If it has moved, add weight. For sites with strong wind, current or swell, Aquaglide suggests up to 50% more weight or holding power.

    Keep it away from hard objects

    It is tempting to tie an inflatable dock to the end of a pier. RAVE’s manual says not to connect its Aqua Dock directly to docks, piers or other hard objects, and Aquaglide says never to tie its lakefront product to a dock. Anchor it on its own instead. If you tie a dock off a boat for the afternoon, do it at anchor with the engine off, and remember the CDC’s advice to stay at least 20 ft from boats running an engine or generator because of carbon monoxide.

    Local rules

    Anchoring is also a legal matter in many places. Illinois’s statewide dock permit requires docks to be securely anchored so they do not break loose and become a floating hazard in high water or wind. Minnesota’s boating guide says swimming rafts and similar structures not attached to shore may not stay in the water between sunset and sunrise without a county sheriff’s permit, with a light or reflectors. Check your state and lake rules before you leave a dock out overnight.

    Next steps: floating dock installation, a floating dock on a river (current changes everything), portable docks, floating docks for ponds and lakes, the Setup and Care guide, and the lake docks hub. Words like scope, bridle and freeboard are in the glossary.

    Anchoring questions

    How much weight do I need to anchor a floating dock?

    Whatever your maker states. The figures we found range from about 150 to 200 lb (RAVE, 10 x 10 ft inflatable) to 1,100 lb (Aquaglide Docking Station) and 4,400 lb (Aquaglide C Lounge). We do not calculate anchor weight from size; if your maker publishes nothing, ask them, or a local dock and mooring installer.

    One anchor or two?

    Use every anchor point the maker provides. RAVE’s dock has two, one at each end; Aquaglide’s Docking Station has five. Two or more anchors stop the dock spinning and spread the load.

    Can I use cinder blocks as floating dock anchors?

    People do, but no dock maker we checked specifies them. Makers sell purpose-made weights instead; Aquaglide says its sand-filled anchor bag is unlikely to damage boats or inflatables. Whatever you use, reach the maker’s total weight.

    How deep should the water be?

    RAVE and Aquaglide ask for at least 4 ft under the docks above, and 4.8 ft for the C Lounge. If people will jump, look for more.

    How do I anchor a dock where the water level changes?

    Leave slack, check often, or use hardware that slides: pipes through collars, piling brackets or stiff arms on rigid docks. For big swings, see our river guide.